See Your Own Room in a New Style Before You Buy Anything
AI Flip Room · 8 min read
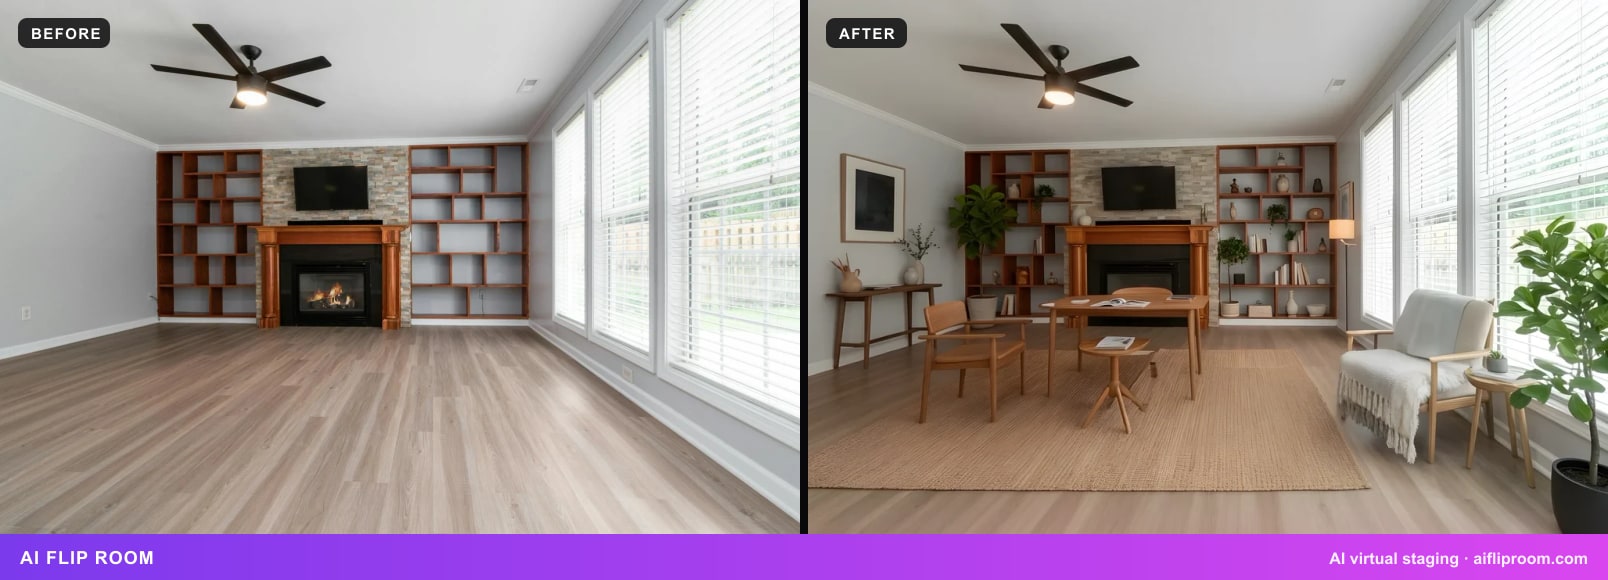
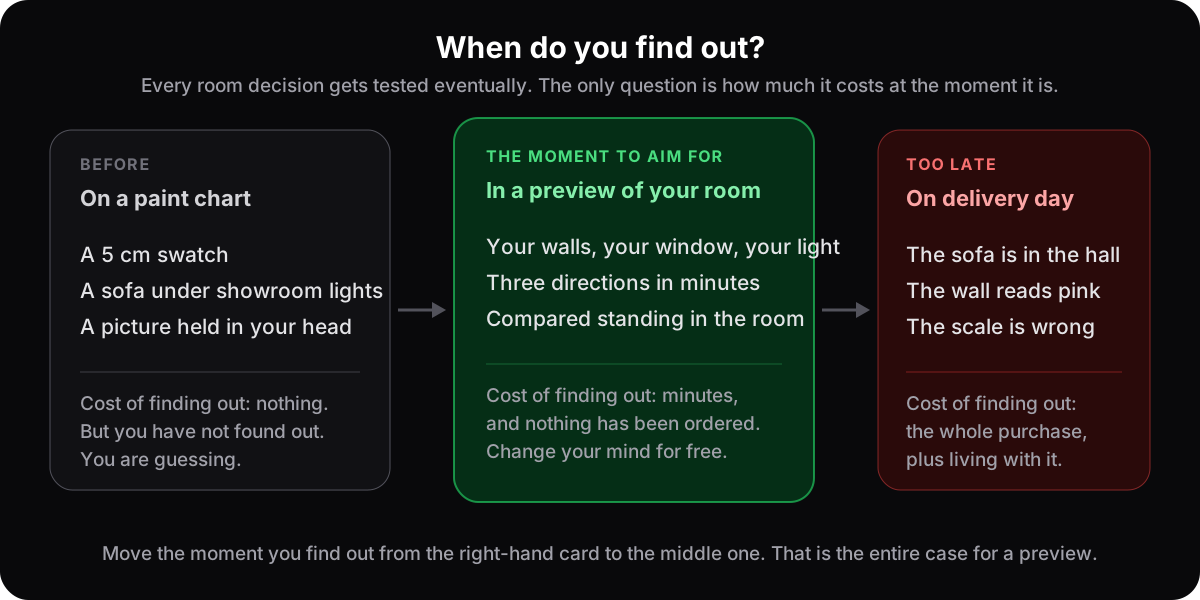
Most people making decisions about a room are working blind. You stand in the doorway holding a paint chart, trying to picture a sofa that does not exist against a wall you have looked at every day for six years, and you are supposed to commit several thousand dollars on the strength of that mental image. Then the sofa arrives and it is the wrong scale, or the colour that looked warm on a card looks pink on the wall, and the money is gone.
This is not a failure of imagination on your part. It is genuinely hard. Human visual memory is bad at holding an unfamiliar arrangement of a familiar space, and it is worse at judging how one change affects everything else. Which is why the cheapest and most useful thing you can do before spending anything is to look at your own room, changed, in a picture.
Here is what that looks like in practice: one empty living room, photographed once, taken in four directions.
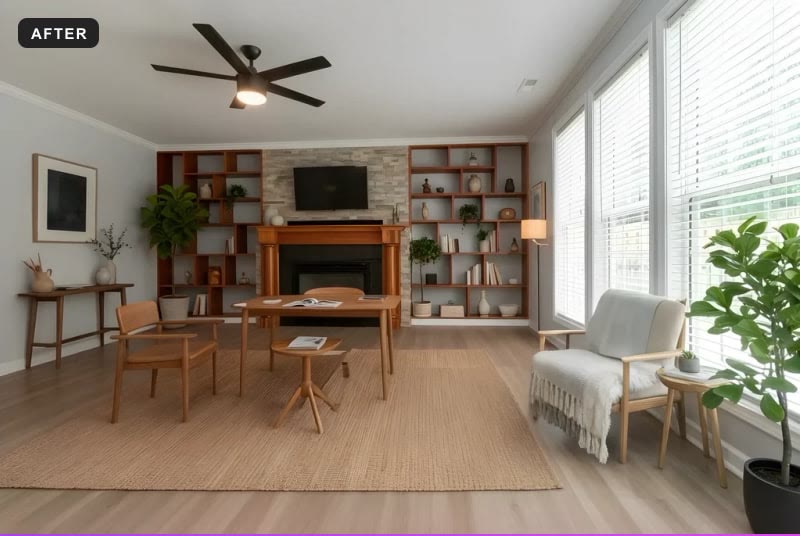
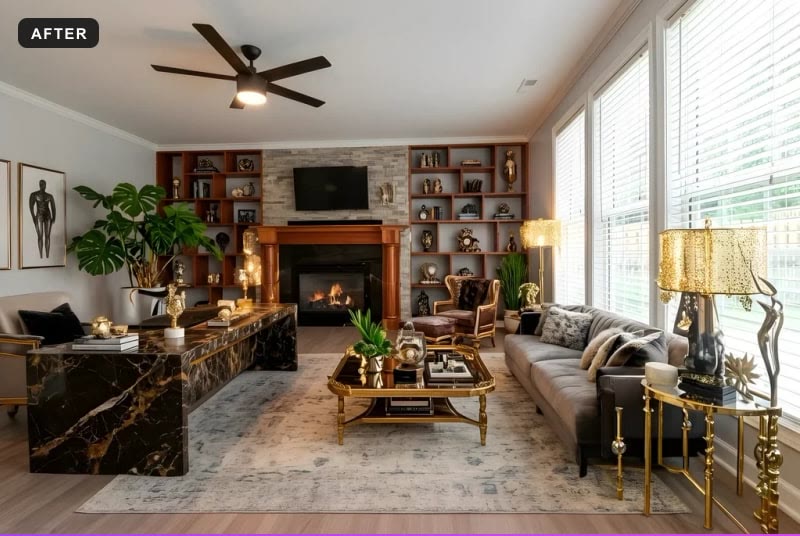
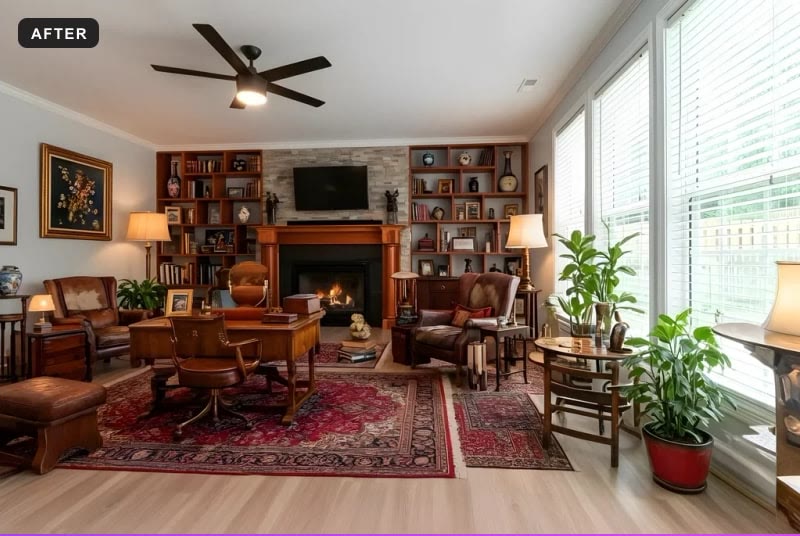
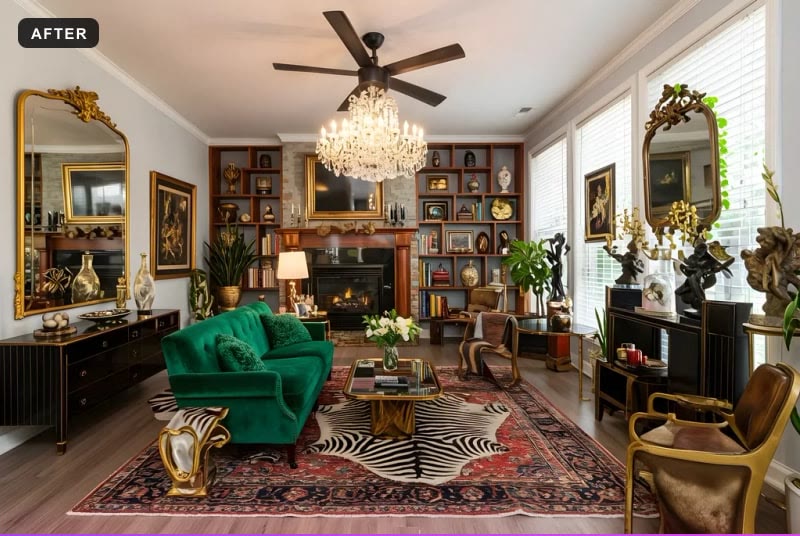
That is the whole idea. The room stays yours — the same fireplace, the same windows, the same awkward corner — and the decision becomes something you can look at instead of something you have to imagine. This article covers what a preview like that settles, what it cannot tell you, how to get a useful one in five steps, and where it pays off most. We make the tool that produced those frames, AI Flip Room, so read the how-to with that in mind.
Why don't magazine photos help?
Because they are not your room. An inspiration photo changes everything at once — proportions, windows, daylight, ceiling height, the furniture, the styling — so you cannot tell which part you are responding to. A preview of your own room changes one thing, the direction, and leaves the house in place.
The usual research method is to collect images of other people's rooms until one of them feels right. It is enjoyable and almost useless for making a decision, for three reasons.
Those rooms are not your room. They have different proportions, different windows, a different amount of daylight and different fixed features. A scheme that looks generous under a three-metre ceiling can feel oppressive under a standard one, and nothing in the photograph tells you that.
They are also photographed in ideal light, usually with furniture chosen for the shot rather than for daily life. And they show a finished state without showing what it took to get there, so you cannot tell which parts are the paint, which are the furniture, and which are the architecture you do not have.
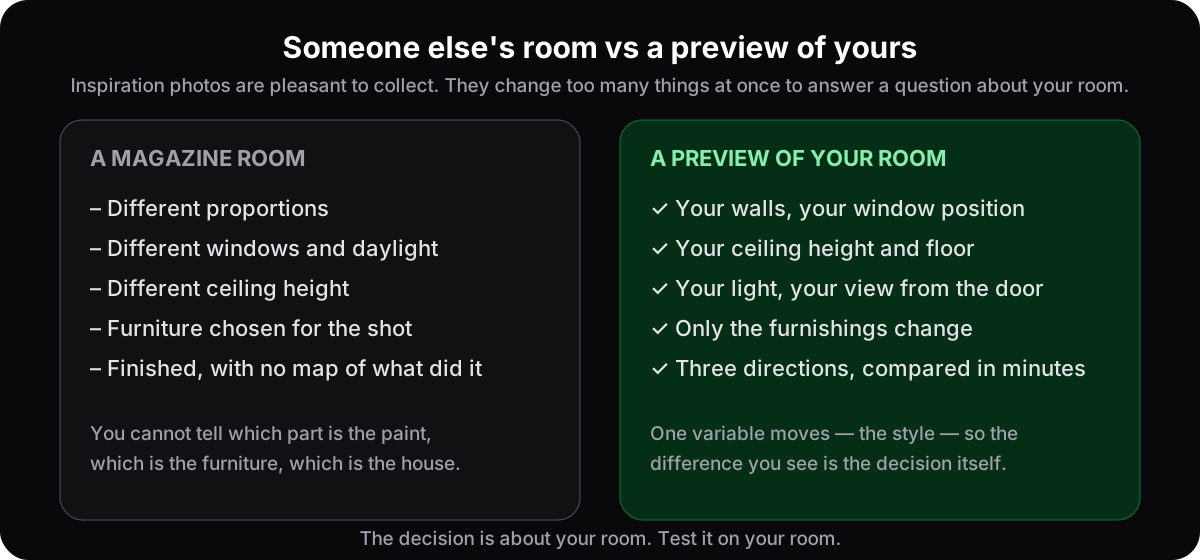
What actually settles a decision is seeing the change applied to the space you already own — your walls, your window position, your ceiling height, your view from the doorway.
What does a preview actually solve?
Four things, quickly: which direction suits the room, whether the furniture is the right scale and in the right place, whether a colour survives your light, and whether you actually like it once it is on your walls. It settles those before you order anything. It does not measure, price or specify.
Direction. Before you commit to anything, you can see whether your room suits a calm, pale Scandinavian treatment, the warmth of farmhouse, or the discipline of Japandi. Trying five directions costs minutes rather than a weekend of showroom visits, and the answer is frequently not the one you expected. If you already lean one way, the room pages are the shortcut — a Japandi living room or a Scandinavian bedroom shows what the style does in that room specifically, and the Japandi and Scandinavian guides cover the palette and materials behind each.
Scale and layout. A furnished version of your room shows whether a large sectional swallows it, whether the sofa should face the window or the fireplace, and whether the corner you were planning to fill actually works better empty. Look back at the four frames above: the same floor holds a dining table, a study, a deep sofa and a velvet settee, and each arrangement tells you something different about the room.
Whether a colour survives your light. A palette that looks warm in a south-facing room can turn grey in a north-facing one. Seeing it in your own room, lit by your own window, is far more informative than any paint chart.
Whether you actually like it. This sounds trivial and it is the most valuable one. People often discover that the look they have been collecting images of for months does not suit their room at all, and they discover it before ordering anything rather than afterwards.
| A preview settles | A preview does not settle |
|---|---|
| Direction — calm and pale, warm and rustic, or dark and disciplined | Structure — whether a wall is load-bearing or a floor will take a stone bath |
| Scale and layout — does the sectional swallow the room; sofa to the window or to the fireplace | Measurements — the alcove still needs a tape measure |
| Colour in your light — the palette on your wall, lit by your window | Price — what a builder or a kitchen supplier will quote |
| Whether you like it — found out before ordering, not after | The shopping list — the chair in the render is a direction, not a product code |
What can it not tell you?
It is a picture, not a plan. A preview will not tell you whether a wall is load-bearing, what a builder will charge, or the width of the alcove; the chair in the image is not a product you can order; and it works from the photo you give it, so a dark, tilted shot gives a weaker answer.
It is worth being clear about this, because taking a visualisation for more than it is causes its own expensive mistakes.
It will not measure your room for you. If a sofa needs to be under 210 cm, you still have to measure the alcove with a tape. It will not tell you whether the floor can take a heavy bath or what the work will cost — those are questions for a tape measure, a structural engineer and a quote.
It will not do the shopping. A preview shows a direction convincingly, but the exact chair in the image is not a product you can order; what you are buying is clarity about what to look for, not a shopping list.
It works on the room you photograph. If the picture is dark, crooked or half a room, the result will be weaker — the render is built on whatever geometry it can read. Our guide on how to photograph a room properly covers the handful of habits that make the difference, and none of them need a real camera.
And read the frames honestly. Of the four directions above, three changed nothing but the furnishings. The fourth, the Hollywood Regency, added a chandelier and covered the television with a picture. For an owner deciding on a look, that is useful — it shows the room with a fixture it does not have. For a listing it would be over the line, which is why the caption says so and why the section on selling is below.
How do you get a useful preview in five steps?
Take one level, daylit photo of the whole room; upload it; pick a direction or describe one; look at the result on your phone while standing in the room; then run two more directions before you decide. The comparison is what produces the answer. Start to finish, it takes a few minutes.
A useful preview in five steps
- 1Take one clean photoDaylight, lamps off, phone level at chest height on the normal 1x lens, standing back far enough to get the whole room in frame. Clear the loose clutter — the render does better with clear surfaces. The full set of habits is in how to photograph a room for staging; none of them needs a real camera.
- 2Upload itStraight from the phone, on the generate page. No account gymnastics: every account starts with three free renders and no card, which is exactly enough for what step five asks of you.
- 3Pick a direction, or describe oneChoose from the style library — a calm Japandi living room, a pale Scandinavian bedroom, the warmth of farmhouse — or write what you want in your own words. The render takes 15–60 seconds, depending on how much detail the room has.
- 4Look at the result while standing in the roomThis is the step people skip and the one that matters. Open the picture on your phone, stand where the photo was taken and hold it up against what is in front of you. Scale, light and colour are easiest to judge with the real wall next to the rendered one.
- 5Run two more directions before you decideOne calm, one warm, one bolder than you think you want. A single image on its own is just a nice picture; the comparison between three is what produces the answer, and it is usually not the one you expected.
Three free renders, no card, is what every account starts with — enough to take one room in three directions before you decide whether this is useful to you. The pricing page covers what happens after that if you are working through a whole house.
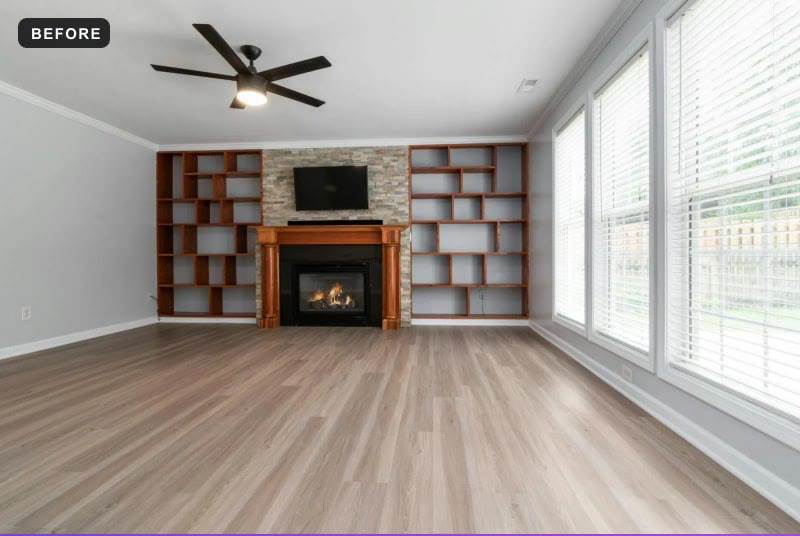
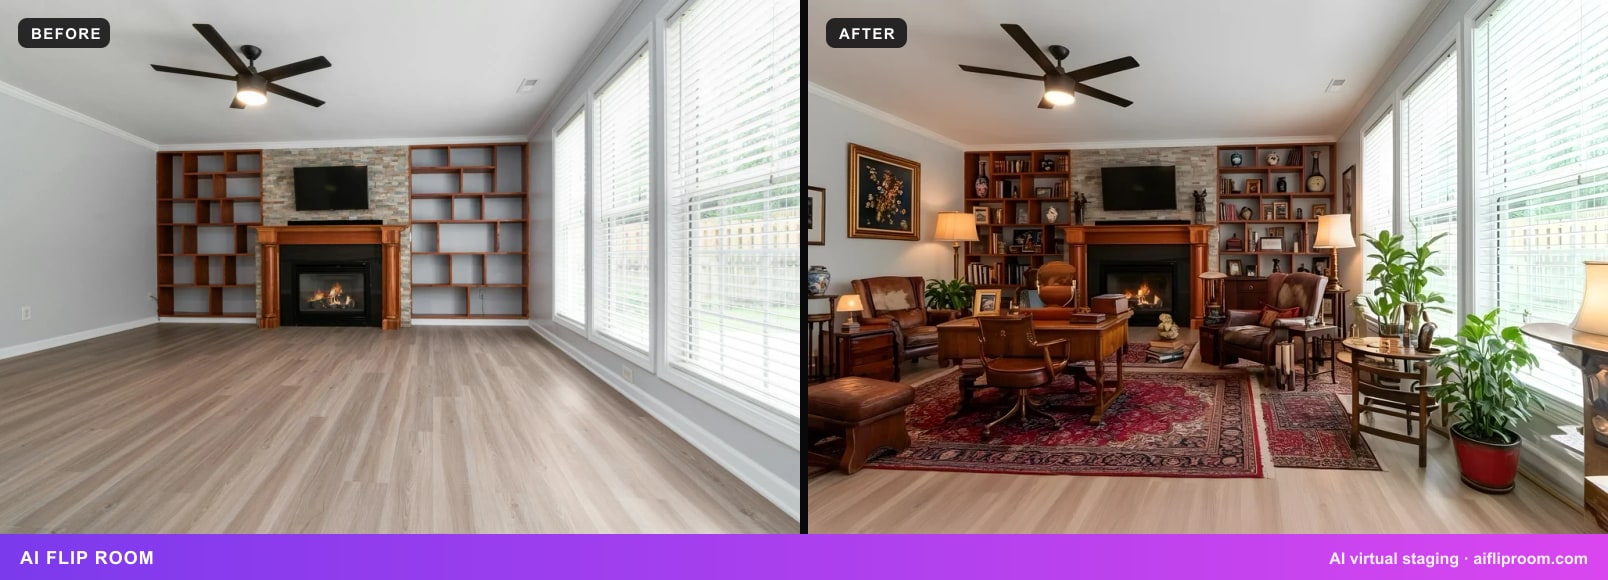
Here is what one clean photo comes back as.
Where is it most useful?
Anywhere a mistake is expensive or hard to undo: before a large piece of furniture, before a weekend of painting, before a renovation quote, when a room resists every attempt and you cannot say why, and outdoors, where people find it hardest to picture a change at all.
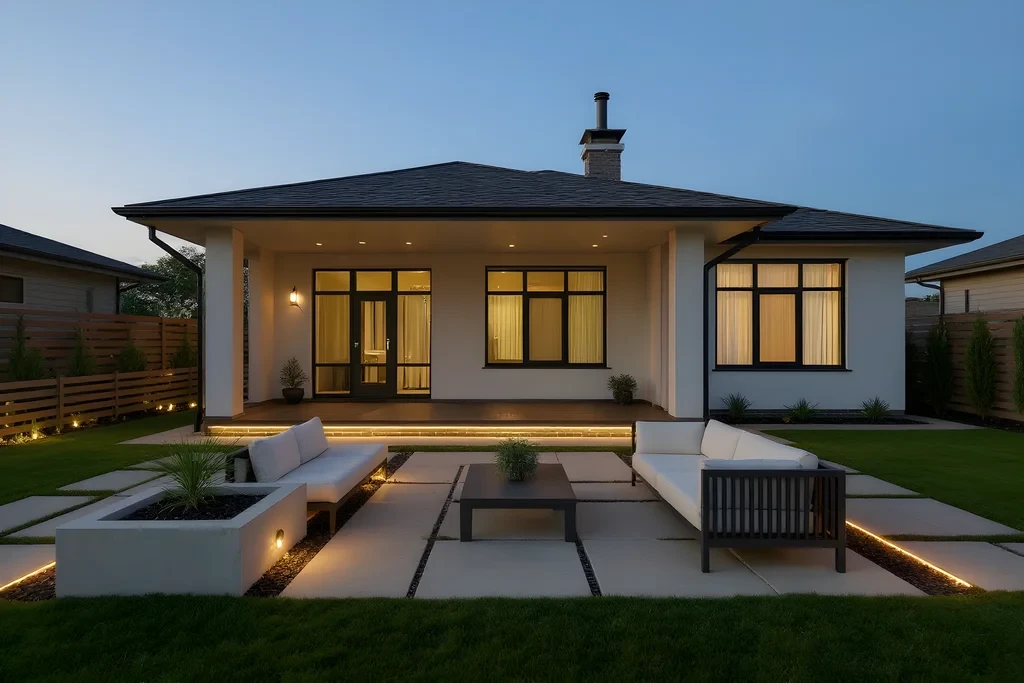
Outdoor spaces deserve a word of their own, because they are where a preview is most often skipped. A patio or a deck responds to furniture, lighting and planters exactly as a living room responds to a sofa and a rug, and the difference between a bare slab and a furnished one is bigger than most people expect.
Does it matter if you might sell later?
Only then. If you are redecorating for yourself, do what you like with the previews. If the same photos might go into a listing, the rule is that a restaged image must be labelled as such and must not change the property itself — furnishings yes; walls, windows and fixtures no.
The wording differs by market, and it is not an obstacle: buyers understand a clearly labelled visualisation perfectly well. But the label is not optional, and neither is the line between furnishing a room and altering it. Our guide on disclosure rules explains the principle and quotes the rules for the three jurisdictions we have read in full; what virtual staging is covers the background if the term is new to you.
Start with one photo
You are going to spend real money on the room either way. Spending a few minutes first to see it changed, in a picture of the space you actually own, is the cheapest step in the entire process and the only one that reliably prevents the expensive kind of regret.
Start with the room that is bothering you most. Take one photo, run it in three directions, and look at the results standing where you took it. If you want to see the level of realism to expect before you try it on your own space, the showcase has finished before-and-after examples.
Questions people ask before trying it
Can I preview my room with the furniture still in it?+
Yes. The render restyles what is in the photo rather than needing an empty room. The walls, windows, doorways and fixed features stay where they are and the furnishings change. Clear the loose clutter first: mail, cords, dishes, toys. Big pieces can stay; they are simply replaced in the picture. An empty room is the easiest case, not a requirement.
Will the preview show me exact products I can buy?+
No. The sofa in the render is a direction, not a product code. What the preview gives you is a clear brief: the shape, the scale, the colour family and the amount of pattern the room can carry. Take a screenshot to a shop or a designer and the conversation starts from a picture of your actual room instead of a description of it.
How many previews do I need before I can decide?+
Three of the same photo is the useful minimum: one calm, one warm, one bolder than you think you want. A single image is just a nice picture; the comparison is what produces the answer. Every account starts with three free renders and no card, which is exactly enough to run one room three ways before you decide whether it is useful to you.
Can I use a preview to plan a kitchen or bathroom, not just a living room?+
Yes, for the visible layer: cabinet fronts, worktops, tile, colour, lighting and the overall direction. The sink, the windows and the plumbing stay where they are in the render, as they would in most real projects. What a preview cannot do is price the work, tell you what is behind a wall or replace a measured drawing. Take it to the trades as a brief, not as a plan.
See it on your own room
Upload a photo and watch AI restage your space in 15–60 seconds, depending on how much detail it has — free to try, no credit card.
Try AI Flip Room freeRelated reading
How to Photograph Rooms for Virtual Staging: 7 Rules
Daylight, lamps off, a level phone at chest height, the 1x lens not 0.5x, one room per frame, clear surfaces — seven habits that make AI staging look real.
Japandi Style Guide: Palette, Materials, Furniture, Rooms
What Japandi is, the palette and materials that make it read as real, the furniture that works, how it changes room by room, and the mistakes to avoid.
What Is Virtual Staging? How It Works, Cost, Rules
Virtual staging explained: how AI furnishes a photo of a real room, what it costs vs physical staging, where it helps most, and the one disclosure rule.